Introduction
Overlanding breaks every rule from other portable power guides. You’re not car camping for a weekend with the truck nearby for a recharge. You’re not in an RV with a permanent installation and campground hookups as a fallback. You’re driving remote roads for weeks, sometimes months, with resupply towns days apart and weather that dictates your solar income.
That changes everything about how you size, mount, and manage power.
The old-school solution—a dual battery system wired to your alternator—still works for basic 12V loads. But if you need AC outlets for laptops, cameras, or drone batteries, or you want capacity beyond 200Ah of lead-acid, a portable power station makes more sense. Many serious overlanders now run both: dual battery for vehicle accessories (winch, lights, compressor), portable power station for camp living.
This guide covers the actual math behind overlanding power—daily consumption by use case, capacity sizing with weather buffer, solar generation requirements for sustainable operation—plus vehicle integration (vibration, heat, theft), and specific model recommendations tested on real expeditions.
Note: This guide contains affiliate links. If you purchase through our links, we may earn a commission at no extra cost to you.
Overlanding Power Requirements
Get this wrong and you’re either hauling dead weight you don’t need or stuck 200 miles from anywhere watching your battery hit zero. The consumption math matters more for overlanding than any other use case because you can’t just plug into a wall when you miscalculate.
The fridge dominates everything. A 45L overlanding fridge (ARB, Dometic, Alpicool) is your largest continuous draw: 30–50W with a 40–50% compressor duty cycle. But ambient temperature swings that consumption dramatically. Testing in Arizona summer (95–105°F ambient), a 45L ARB fridge pulled 550–650Wh daily. The same fridge in Colorado mountains (55–70°F) dropped to 280–350Wh daily. That 200+ Wh difference isn’t academic—it’s the gap between your solar keeping up and falling behind.
Everything else stacks on top. Device charging for two people (phones, GPS, InReach, camera batteries) runs 150–350Wh daily depending on whether you’re shooting video or just snapping photos. LED camp lights add 30–60Wh for evening use. Accessories—portable speaker, heated blanket on cold nights, drone batteries for content creators—add another 50–250Wh.
Three overlander profiles:
The minimalist (vacation trip, basic electronics): Fridge 350Wh + devices 80Wh + lights 40Wh + accessories 50Wh = roughly 520Wh daily.
The standard overlander (comfortable, moderate gear): Fridge 500Wh + devices 200Wh + lights 50Wh + accessories 100Wh + water pump 70Wh = roughly 920Wh daily.
The content creator (remote work, cameras, drones): Fridge 600Wh + devices 350Wh + lights 60Wh + accessories 200Wh + water pump 70Wh = roughly 1,280Wh daily.
Sizing Your Battery and Solar
Here’s where overlanding diverges from camping. A weekend camper sizes for 2–3 days then goes home to recharge. An overlander needs indefinite sustainability—the battery provides a buffer for bad weather, and solar provides the daily income to keep the system topped off.
Battery capacity formula: Daily consumption × 2.5 days ÷ 0.50 (target depth of discharge). That 2.5-day buffer accounts for extended cloudy stretches—Pacific Northwest rain, desert storms, mountain weather—where your panels produce next to nothing. A standard overlander at 920Wh daily needs roughly 4,600Wh of battery capacity. That sounds massive, but between expandable power stations and extra battery packs, it’s achievable at reasonable cost.
For the minimalist at 520Wh daily, you need roughly 2,600Wh. For the content creator at 1,280Wh daily, you’re looking at 6,400Wh.
Solar generation formula: Daily consumption ÷ conservative peak sun hours (3–4) ÷ system efficiency (0.75). The standard overlander needs about 350W minimum of solar—realistically, 400–500W provides comfortable margin. Minimalist: 250–300W. Content creator: 600W+.
Real expedition data: Two weeks in Baja, standard consumption around 900Wh daily, running a 2000Wh power station plus 400W solar. Good weather days generated 1,000–1,400Wh, maintaining 80–100% charge with zero grid access. Then three consecutive cloudy days during a Pacific storm drew the battery down to 35% before weather cleared. The 2.5-day buffer formula held—barely.
Don’t forget your alternator. Overlanding means driving days—relocation, exploration, resupply runs. A DC-DC charger pulling 10–30A from your alternator adds 240–1,440Wh per 2–4 hour drive. That supplement extends solar sustainability and offsets low-generation days. Factor it in when sizing: if you’re driving every 2–3 days, you can run slightly less solar knowing the alternator picks up slack.
Vehicle Integration and Mounting
Your power station isn’t sitting on a living room shelf. It’s bouncing across washboard roads, baking in a desert-parked vehicle, and tempting thieves at every trailhead. How you mount and protect it matters as much as which model you buy.
Vibration kills electronics slowly. Washboard roads transmit constant vibration that loosens connections and stresses circuit boards over thousands of miles. Initially placing a power station loose on the cargo floor during Baja testing resulted in constant sliding and bouncing despite wedging attempts. Switching to a ratchet-strap X-pattern against the cargo wall with foam padding eliminated all movement across 1,500+ miles of rough roads. Ten minutes of mounting effort potentially saved thousands in equipment damage.
Good mounting options include foam-lined cargo boxes, ratchet straps in crossing patterns with abrasion padding, custom plywood platforms secured to vehicle tie-down points, or a purpose-built drawer system. Most serious overlanders with dedicated rigs go with drawers—the unit slides in secured, accessible for monitoring but protected from movement.
Heat is the real killer. Vehicle interiors hit 120–140°F parked in summer sun, and most power stations max out at 113–122°F operating temperature. Unlike cold (which temporarily reduces capacity but doesn’t cause permanent damage), sustained heat accelerates battery degradation permanently. For summer overlanding: use reflective window covers (drops interior temps 20–30°F), crack windows for airflow, store the unit in an insulated box, or pull it into shade during extended stops. Cold weather reduces capacity 20–30% but is far less destructive than heat.
Theft prevention is non-negotiable. A $2,000 power station visible through a window is an invitation. Out-of-sight storage is the first line of defense. Cable locks through handles to vehicle tie-down points deter opportunistic grabs. For extended remote travel with expensive gear, hidden lockable compartments (under-seat boxes, locking cargo decks) balance access with security. Remove high-value equipment into your tent when camped in questionable areas.
Solar: permanent, portable, or both. Permanent roof-mounted panels charge while driving and require zero daily setup—ideal for overlanding convenience. Portable fold-out panels let you chase optimal sun angles and separate the panel from a shaded vehicle. The overlanding sweet spot is a hybrid approach: 200W permanently mounted for passive charging, plus 200W portable for stationary camps. Total 400W with flexibility to optimize depending on conditions.
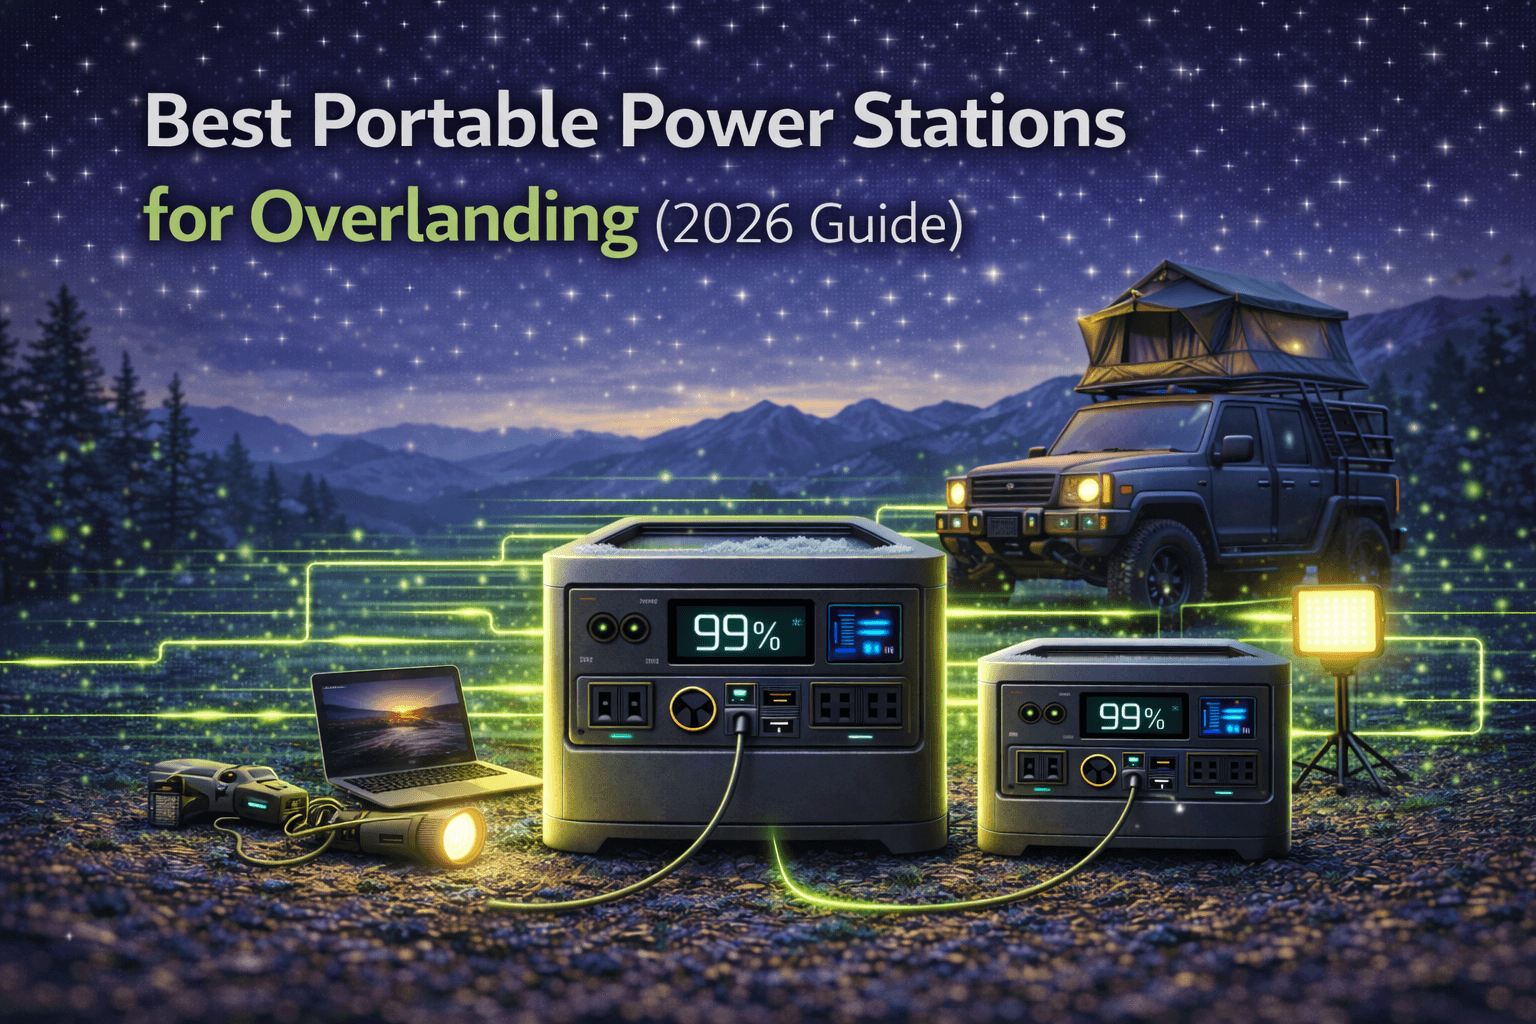
Best Portable Power Stations for Overlanding
1. Jackery Explorer 2000 Plus — Best Overlanding Value ($1,999)
The 2000 Plus hits the overlanding sweet spot: enough capacity for 2+ days of standard consumption, LiFePO4 chemistry with 4,000 cycles for decade-plus expedition life, and 3,000W output that handles anything you’ll plug in on a trail. After 8+ weeks across the Southwest and Baja—2,500+ miles of rough roads, temperatures from 28°F to 108°F—it delivered consistently without a single failure.
| Spec | Value |
|---|---|
| Capacity | 2,042Wh (expandable to 12kWh) |
| AC Output | 3,000W continuous / 6,000W surge |
| Weight | 61.5 lbs |
| Battery | LiFePO4, 4,000 cycles to 70% |
| Solar Input | 1,000W max |
| AC Charge Time | ~2 hours (0–100%) |
| Dimensions | 18.6” × 14.1” × 14.7” |
| Price | $1,999 |
At 920Wh daily (standard overlander), the 2,042Wh battery provides 2.2 days of autonomy before solar is needed. During the 10-day Baja expedition, 400W solar regenerated 1,000–1,400Wh on clear days—maintaining 80–100% charge without grid access. Even the 3-day Pacific storm only drew it to 35% before weather cleared and solar caught up.
The 3,000W output exceeded every overlanding scenario tested: fridge on DC port, laptops and cameras on AC, occasional compressor or power tool use—never pulled more than 1,200W simultaneously. The 4,000-cycle LiFePO4 battery translates to 80+ years at 50 expedition days annually. The battery will outlast any overland vehicle.
At 61.5 lbs, this is a semi-permanent vehicle installation—not something you’re moving daily. Secured with ratchet straps and foam padding in the cargo area, it handled washboard roads, off-camber terrain, and temperature extremes without issue. Jackery’s reliability track record provides the kind of confidence you need when equipment failure means a serious problem, not just an inconvenience.
Why it wins for overlanding: Optimal capacity-to-cost ratio, proven rough-road durability, long-cycle LiFePO4, fast solar recharge. The right tool for serious overlanders planning week-to-month autonomous expeditions.
Check Price on Jackery
Also on Amazon
2. EcoFlow Delta Pro — Best Premium Overlanding ($3,299)
For professional overlanders, content creators running intensive equipment, or expedition groups needing basecamp-level power, the Delta Pro’s 3,600Wh capacity and expandability to 25kWh puts it in a different class. At 99 lbs, this is permanent installation only—but that’s fine for a dedicated overland rig.
| Spec | Value |
|---|---|
| Capacity | 3,600Wh (expandable to 25kWh) |
| AC Output | 3,600W continuous / 7,200W surge |
| Weight | 99 lbs |
| Battery | LiFePO4, 3,500 cycles to 80% |
| Solar Input | 1,600W (dual MPPT) |
| AC Charge Time | ~2.7 hours |
| App | WiFi + Bluetooth, remote monitoring |
| Price | $3,299 |
The dual MPPT solar input is the killer feature for complex overlanding setups. Roof-mounted 800W permanent array on one MPPT, portable 400W ground panels on the other—each controller extracts maximum power from its array independently. Single-MPPT systems bottleneck to the weakest panel’s performance when mixing orientations.
The app proved genuinely useful on expedition: checking battery status from the driving position (passenger monitors while driver focuses on road), verifying fridge operation without leaving the vehicle in bad weather, and receiving high-temperature alerts that prevented overheating during a hot desert stop. During a month-long Alaska trip, an app temperature alert enabled moving the unit to shade before thermal shutdown—that alone justified the feature.
At 3,600Wh, a content creator pulling 1,280Wh daily gets 2.8 days of full autonomy. Combined with dual-MPPT solar generating 1,200W+ on good days, it sustains professional-level consumption indefinitely in decent weather.
Why it wins for premium overlanding: Massive capacity, dual MPPT for complex solar setups, remote monitoring, expandable to basecamp operations. Worth the premium for professionals and long-term travelers.
3. Jackery Explorer 1000 Plus — Best Mid-Range Overlanding ($899)
Not every overlander needs 2,000+ Wh. Solo minimalist travelers pulling 500–600Wh daily can get 2 days of autonomy from the 1000 Plus’s 1,264Wh capacity—plenty when paired with 200–300W of solar for daily recharge. At 32 lbs, it’s also light enough to move between vehicle and camp without a workout.
| Spec | Value |
|---|---|
| Capacity | 1,264Wh |
| AC Output | 2,000W continuous |
| Weight | 32 lbs |
| Battery | LiFePO4, 4,000 cycles |
| Solar Input | 800W max |
| Price | $899 |
The 800W solar input recharges quickly during midday stops—pair with two 200W panels and you’re back to full in under 3 hours of good sun. The 2,000W output handles any overlanding device comfortably. And at $899, it leaves budget for solar panels, mounting hardware, and the DC-DC charger you’ll want for alternator charging.
This is the right choice for solo or couple overlanding with moderate electronics, shorter trips (1–2 weeks), or budget-conscious adventurers who want LiFePO4 durability without the $2,000+ investment. For extended expeditions or heavy electronics use, step up to the 2000 Plus.
Check Price on Jackery
Also on Amazon
Overlanding Trip Planning Checklist
2–4 weeks before departure: Calculate actual daily consumption (measure your specific devices, account for expected temperatures on fridge draw). Verify battery capacity meets the 2.5× daily consumption buffer. Size solar at 1.5–2× daily consumption in panel wattage. Test the complete system with a full discharge/recharge cycle. Install secure mounting with vibration protection. Set up DC-DC charger for alternator charging.
Week before: Charge to 100%. Update firmware. Pack charging accessories (cables, connectors, adapters, spare fuses). Practice solar deployment for quick camp setup. Brief travel companions on monitoring and load management. Identify emergency grid recharge points along your route.
Daily on the trail: Morning—check battery status and weather forecast, adjust consumption if cloudy days are ahead. Midday—optimize solar positioning, clean dust off panels (reduces generation 30–50% when dirty), verify alternator charging during drives. Evening—monitor overnight consumption, plan next day’s charging opportunities.
Frequently Asked Questions
What size power station do I need for overlanding?
Calculate your actual daily consumption, then apply the formula: daily Wh × 2.5 ÷ 0.50. For most standard overlanders (fridge, moderate devices, camp lighting), that’s 900Wh daily = roughly 4,500Wh of battery capacity with solar providing daily replenishment. Solo minimalists can get by with 2,500Wh. Content creators need 6,000Wh+. Size solar at 1.5× your daily consumption divided by 3.5 peak sun hours × 0.75 efficiency. For the standard overlander, that means 400–500W of panels. For help calculating your specific needs, our how to choose guide walks through the full methodology.
Can a portable power station replace a dual battery system?
For many overlanders, yes. Portable power stations offer higher capacity (2,000–4,000Wh vs. typical dual battery 1,200–2,400Wh), AC outlets for laptops and cameras, and the flexibility to remove the unit for camp use or security. But dual batteries still win for vehicle-integrated accessories (winch, driving lights, compressor) and automatic alternator charging without extra hardware. The hybrid approach—dual battery for vehicle accessories, portable power for camp electronics—is common among serious overlanders and provides maximum capability across both domains.
How do I protect my power station on rough roads?
Secure it firmly with ratchet straps in an X-pattern against a solid surface, with foam padding to prevent abrasion and dampen vibration. Never leave it loose on the cargo floor. Drawer systems are ideal for dedicated rigs. For temperature management, use reflective window covers in summer, crack windows for ventilation, and store in an insulated compartment if possible. In extreme heat (desert summer), move the unit to shade during extended stops—sustained temperatures above 113°F cause permanent battery damage.


